If you use Mac OS X, you don’t need to install a third-party client like PuTTY to connect to your hosting account via Secure Shell (SSH). Instead, you can use Terminal - a command line emulation program.
Before you start, make sure SSH access is enabled for your hosting account.
1. Open your Terminal application: 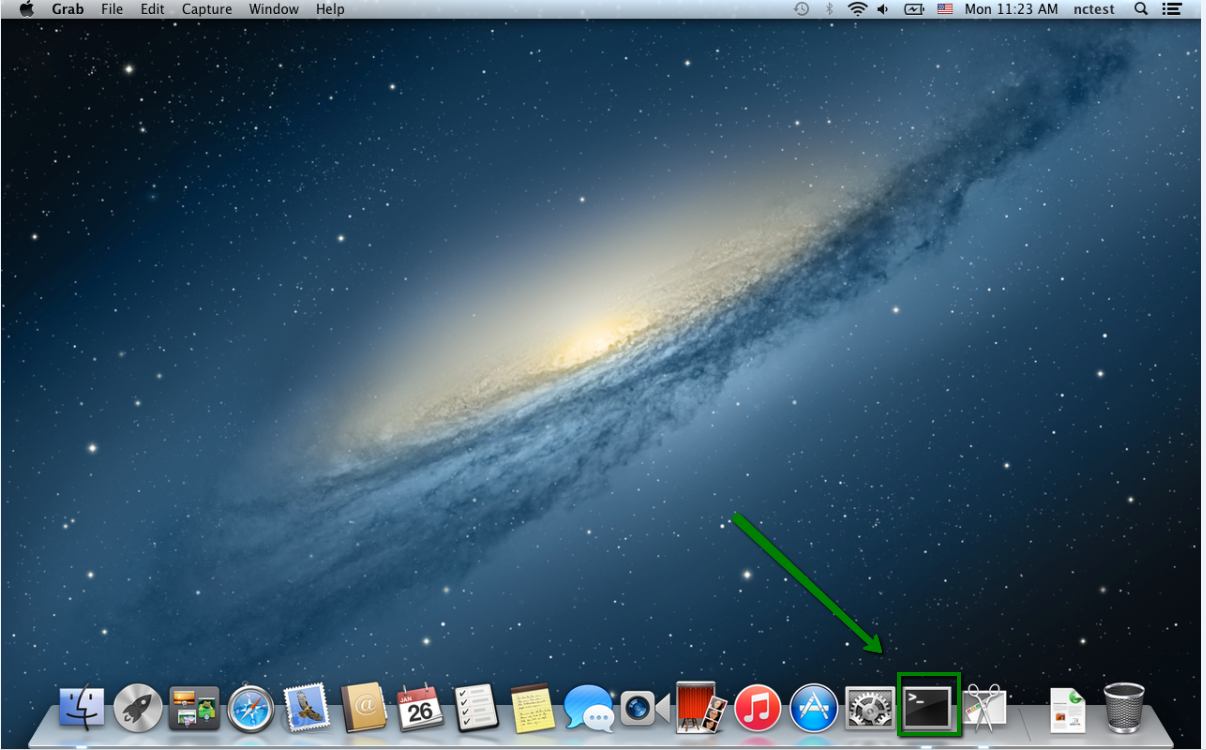
You will see a window with a user$ sign and a blinking cursor. This is your basic command prompt.
From in here, you can establish an SSH connection to your hosting server: 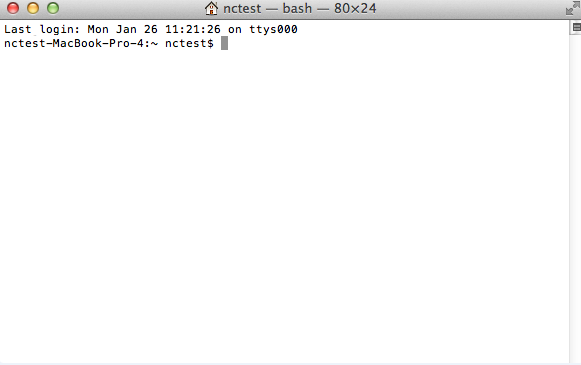
To connect, you need to execute the following command:
ssh USER@SERVER -pPORT
USER: user you want to establish the SSH connection for - root or cPanel username
SERVER: hostname/IP of the server you are connecting to
PORT: connection port - 21098 for a shared server, 22 - for a VPS/Dedicated server 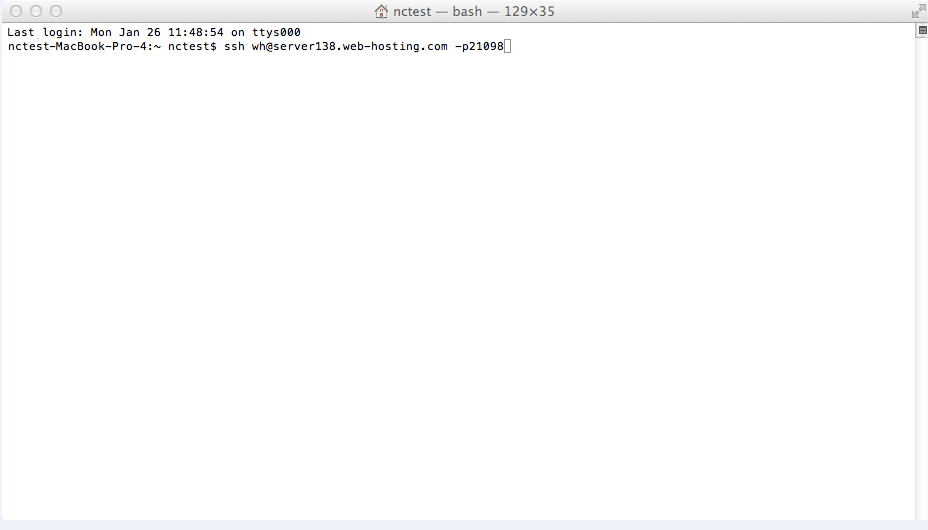
2. Now the computer will attempt to connect to your hosting server.
If it is your first time connecting to the server, you will see a message asking you to confirm the connection establishment. Type yes and press the Enter key to proceed: 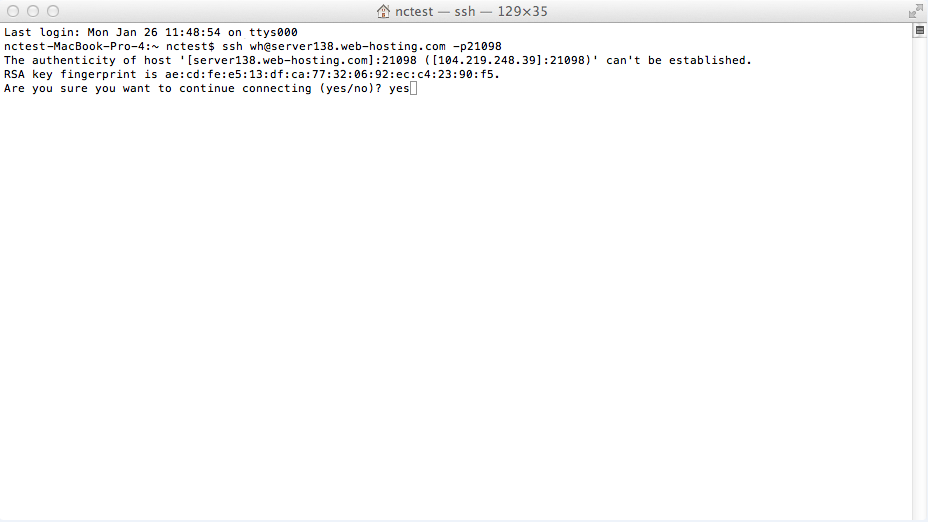
3. You will be asked to input the SSH login details. Type it in and press Enter.
NOTE: The cursor will not be moving when you will be entering your password: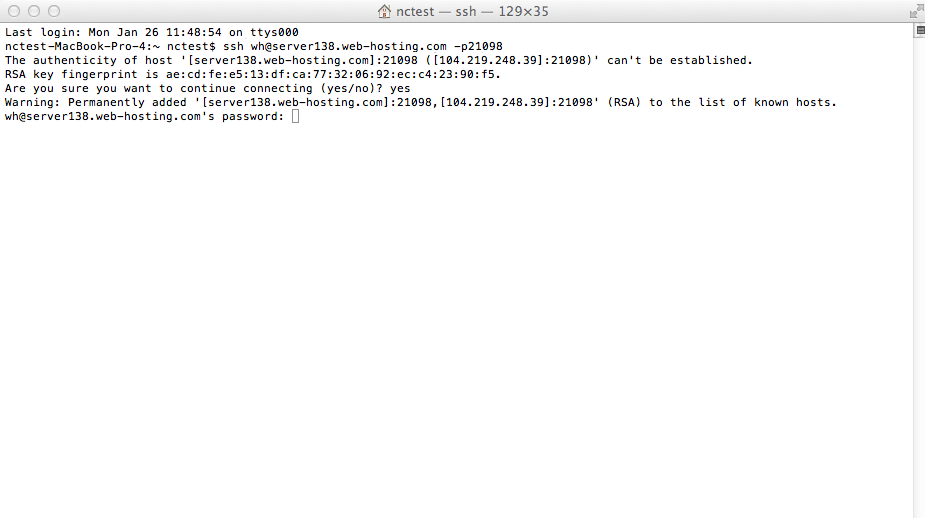
4. If all is good, you will see a line beginning with [user@server ~]$ , this will indicate that the SSH connection has been successfully established: 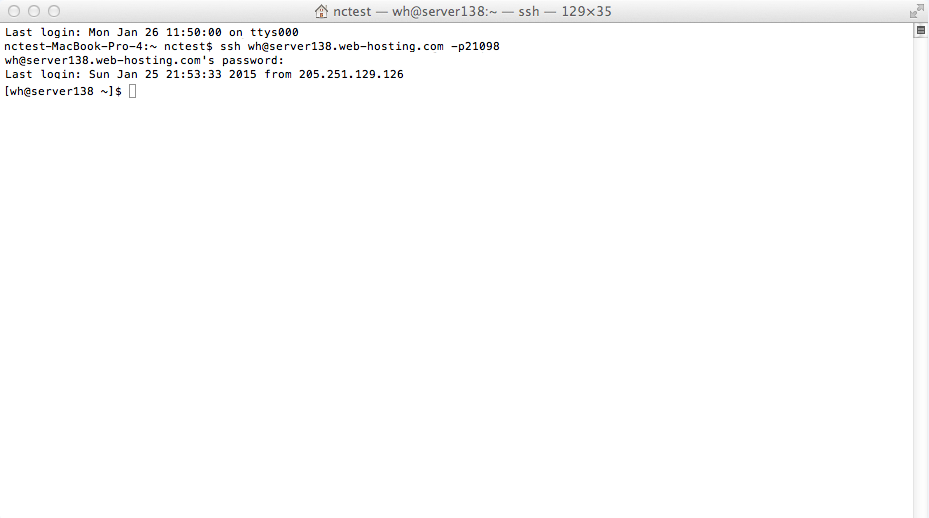
That's it!
Need any help? Contact our HelpDesk
If you use Mac OS X, you don’t need to install a third-party client like PuTTY to connect to your hosting account via Secure Shell (SSH). Instead, you can use Terminal - a command line emulation program.
Before you start, make sure SSH access is enabled for your hosting account.
1. Open your Terminal application:
You will see a window with a user$ sign and a blinking cursor. This is your basic command prompt.
From in here, you can establish an SSH connection to your hosting server:
To connect, you need to execute the following command:
ssh USER@SERVER -pPORT
USER: user you want to establish the SSH connection for - root or cPanel username
SERVER: hostname/IP of the server you are connecting to
PORT: connection port - 21098 for a shared server, 22 - for a VPS/Dedicated server
2. Now the computer will attempt to connect to your hosting server.
If it is your first time connecting to the server, you will see a message asking you to confirm the connection establishment. Type yes and press the Enter key to proceed:
3. You will be asked to input the SSH login details. Type it in and press Enter.
NOTE: The cursor will not be moving when you will be entering your password:
4. If all is good, you will see a line beginning with [user@server ~]$ , this will indicate that the SSH connection has been successfully established:
That's it!
Need any help? Contact our HelpDesk
